|
|
|
|
Simple 2 Meter Ground Plane Antenna
Project Here is a very simple 2 Meter Ground Plane project that can be used as an emergency antenna, in limited space, for quick and easy setup on field day, camping, or just plain outdoor fun. With a bit of beefing up, it would make an excellent starter antenna for just about anyone on a shoe string budget! Got some old solid copper wire laying around, an
SO239, I needed a good 2M antenna to hit the Callaway Amateur Radio league (CARL) club's repeater, about 5 miles away and found the 2 M ground plane project. This is about a 1-hour project, or maybe a little extra to check SWR and trim the wires to the correct length.
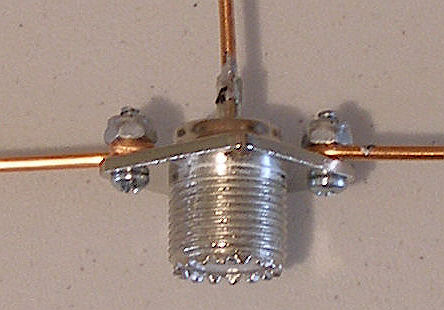
The vertical is soldered onto an SO239. The
ground plane wires are attached with #4 bolts and stop nuts. (Partially
assembled with only 2 ground plane wires so I can take photos
easier)
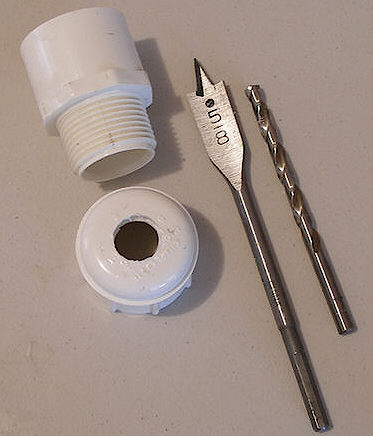
 SO239 mounted in the cap. The PL259 holds everything in place once it is tightened. Not much extra room in that cap. I had to use needle nose pliers to tighten the PL259. All ground plane wires are now in place.  Finished assembly on 1" PVC. The threaded cap allows for disassembly and maintenance. A 2ft piece of PVC is attached at the coupling and on the other end, a T is attached with the feed line coming out of the T. I just stick this on top of a mast. See picture below. 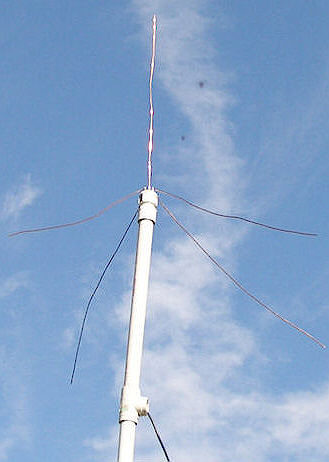 Not quite done yet, but this is what it looks like. I used a T fitting to get the feed line out of the PVC and over to my shack. Just need to check the SWR and trim the wires to length. The angle is deceptive. It's only 12ft high.  Assembled antenna with "custom movable mount". Standard hillbilly engineering straight out of the Ozarks! All that's left is to trim the wires using an SWR meter
until you get good resonance. Trim just enough length off wires to get
good resonance, or you will have to start over. This antenna has no gain but with 1:1 SWR and proper trimming of wires is very resonant across the entire 2M band. 73s KC0YNR  Monitor police, fire, ham radio, rescue, ships and more!  Hamuniverse.com uses Green Geeks Web Hosting! |